Essential Guide to Controlling Temperature and Humidity in Egg Incubation Systems
- Apr 2
- 4 min read
Egg incubation demands precise control of environmental conditions to ensure successful hatching. Temperature and humidity play critical roles in embryo development, and even slight deviations can affect hatch rates and chick quality. This guide explains how to maintain stable temperature and humidity levels during incubation using advanced control systems, focusing on practical methods and technology that improve reliability and ease of monitoring.
Why Temperature and Humidity Matter in Egg Incubation
Eggs are highly sensitive to their environment. Temperature affects the rate of embryo development, while humidity influences water loss and shell quality. If temperature is too high or too low, embryos may die or develop abnormalities. Similarly, incorrect humidity can cause dehydration or excessive moisture, both harmful to the embryo.
Maintaining stable conditions requires continuous monitoring and adjustment. This is why modern incubators use controllers that measure temperature and humidity precisely and adjust heating and humidification accordingly.
Measuring Temperature with High Precision
Accurate temperature measurement is the foundation of effective incubation control. The system uses high-precision thermal resistance sensors to measure temperature directly. These sensors provide reliable readings with minimal error, allowing the controller to maintain the temperature within tight limits.
Two temperature probes are used:
One probe measures the dry bulb temperature (ambient air temperature).
The other probe is wrapped in a wet cotton swab soaked with water to measure the wet bulb temperature.
This dual-probe setup allows the system to calculate humidity based on the temperature difference between the dry and wet bulbs.
Calculating Humidity Using Wet and Dry Bulb Temperatures
Humidity is not measured directly but calculated using the difference between the dry and wet bulb temperatures combined with local atmospheric pressure. The system uses the Hyland-Wexler equation, a well-established formula for determining relative humidity from these inputs.
The process involves:
Inputting the local atmospheric pressure into the controller.
Measuring the dry bulb temperature with the dry probe.
Measuring the wet bulb temperature with the wet probe.
Calculating relative humidity using the Hyland-Wexler equation based on the temperature difference and pressure.
This method provides accurate humidity readings without requiring expensive direct humidity sensors.
Controlling Temperature and Humidity
Once temperature and humidity are measured, the controller adjusts the environment using:
Heater: Maintains the ambient temperature by turning on or off based on temperature readings.
Humidifier: Adds moisture to the air when humidity falls below the set point.
The controller continuously monitors these parameters and makes adjustments to keep conditions within preset upper and lower limits.
Alarm System for Safety and Reliability
The system includes alarms to alert the operator if conditions fall outside safe ranges:
Temperature too high or too low triggers an alarm.
Humidity too high or too low triggers an alarm.
Exhaust fan speed too low or stopped triggers an alarm.
The exhaust fan is monitored using a photoelectric sensor that measures its rotation speed. Proper ventilation is essential to maintain air quality and temperature stability inside the incubator.
Compact Control Cabinet Design
Because incubation chambers are often small, the control cabinet must be compact. The controller and related components are housed in a small cabinet placed on top of the incubator. This design saves space and keeps controls easily accessible.
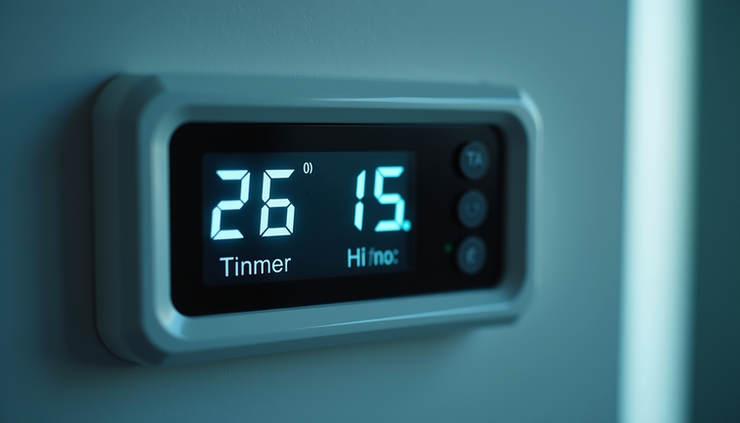
Displaying Data on the HMI Panel
The current temperature and humidity are shown on an HMI (Human-Machine Interface) panel. This display provides real-time data to the operator, making it easy to monitor conditions and respond quickly to alarms.
Practical Tips for Using the Incubation Controller
Calibrate sensors regularly: Calibration in a dry environment ensures temperature probes provide accurate readings.
Input correct atmospheric pressure: Local pressure affects humidity calculations, so enter this value accurately.
Check wet bulb sensor: Keep the cotton swab moist for reliable humidity measurement.
Set alarm limits thoughtfully: Define upper and lower limits based on the species and incubation stage.
Monitor exhaust fan function: Ensure the fan runs smoothly to maintain air circulation.
Example Scenario: Chicken Egg Incubation
For chicken eggs, ideal incubation temperature is around 37.5°C (99.5°F), and relative humidity should be about 50-55% during most of the incubation period. The controller will:
Use the thermal resistance sensors to maintain 37.5°C.
Calculate humidity from wet and dry bulb temperatures and adjust the humidifier to keep humidity near 55%.
Sound an alarm if temperature rises above 38°C or drops below 36.5°C.
Alert if humidity falls below 45% or rises above 60%.
Detect if the exhaust fan slows or stops and notify the operator.
This system ensures a stable environment that maximizes hatch rates and chick health.

Summary
Controlling temperature and humidity precisely during egg incubation is essential for successful hatching. Using high-precision thermal resistance sensors, wet and dry bulb temperature measurements, and the Hyland-Wexler equation, incubators can calculate and maintain optimal humidity levels. The Coolmay EX3G-43H-24MT-2AD-NTC10K controller integrates these measurements with heating, humidification, and exhaust fan monitoring to create a reliable incubation environment.
Operators benefit from real-time data displayed on an HMI panel and alarms that warn of unsafe conditions. Compact control cabinets make installation easy even in limited spaces. Following best practices for calibration, sensor maintenance, and alarm settings helps ensure the best outcomes for egg incubation.